I have been aware recently of how the temperature is very high whilst running qro in the Digital Mode (RTTY) Contests.
Although the Amplifier copes exceedingly well in the conditions, I thought i would feel a lot happier if i could reduce the cooling time down more efficiently. I have a colleague that had done a similiar modification in the Acom 2000 and thus the reason for this modification.
The proceedure was very easy and did not require any soldering at all. It was however easier to have another colleague to assist though as it can be a bit tricky manouvering the transformer whilst trying to carry out the work on the circuit board within the Amp.
The first job is to remove the top cover from the Acom. It is easy to do but as always, make sure you have plenty of space to work, some clean cloths and/or towels etc then as the cover and other items are removed you will have no accidents such as screwdriver scratches or dents as the proceedure moves on.
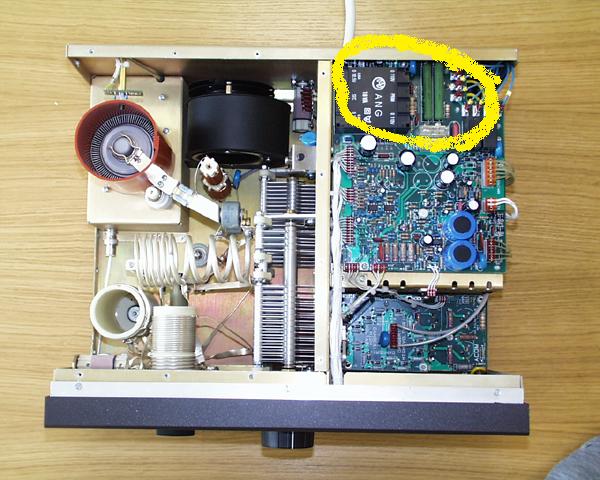
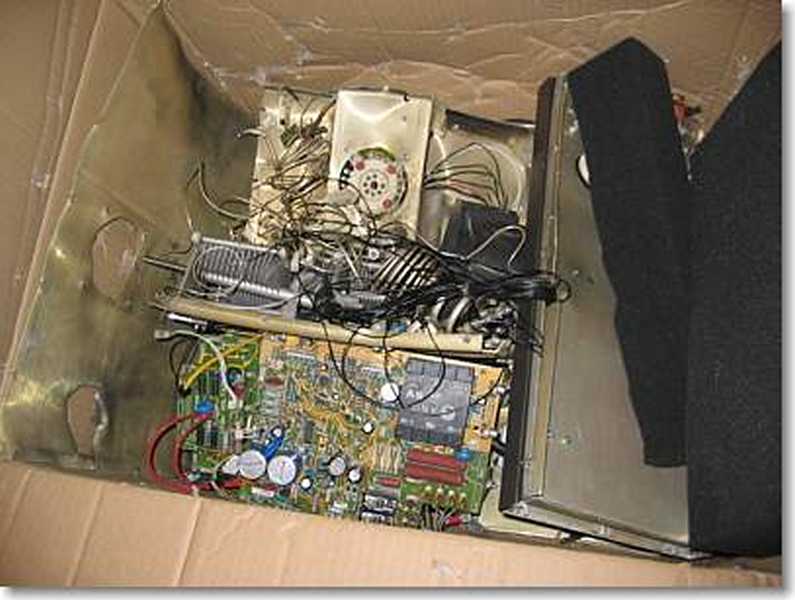
Once the cover has been removed, familiarise yourself with the Transformer and the area of the Amplifier in which you are going to work. The fan itself will be attached to the outside of the case and to do this we need to remove the transformer. The are we will be working on is shown in the photograph to the right.
I am sure you will be aware which part of the Amplifier is the Transformer so no need to insert a photograph to show that, by my non-tech standards even i know that hi!
The next thing we need to do is to negotiate our way into the Amplifier to move the transformer and therefore gain access to the area where we need to be. We need to remove four screws which hold the rear grill in place and to do this it is easier to remove the Transformer rather than fiddling about with fat fingers and struggling as a result. It should be noted here that i bought the second fan from the UK Acom agent, Ron Stone at Vine Antennas. This fan already came with four longer screws which are needed to bridge the larger distance created by adding this new unit. The four screws in place at the moment are not sufficient to complete this task.
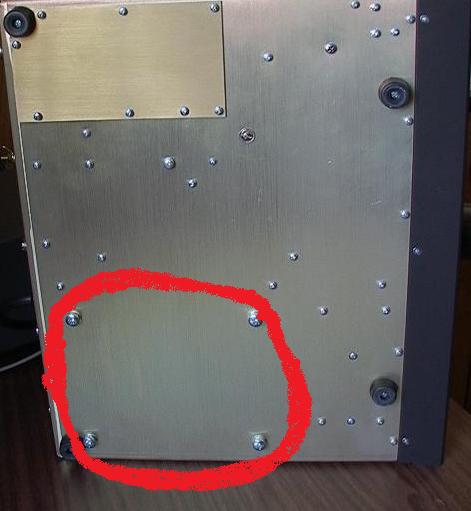
If you turn the Chassis onto its side you will see there are a significant number of screws in the bottom cover however we are only interested in the four large bolts that are shown in the bottom left of the photograph to the left of this text. After removing the two connecting cables from the transformer, carefully remove the two farthest bolts. So still secured with two of the four bolts, move the amplifier over the edge of the bench and remove the other two and this will leave the transformer free to be moved. It is important not to take out all four bolts at the same time as that will leave the transformer unsecured and free to slide whereever inside the case and which would ultimately cause damage to the componants or chassis.Once the
 transformer is out you will see that you have a large amount of room now so you can manoeuvre about with ease. Next step is to remove the grill from the rear ventilation space. Just undo the four small screws and remove it.
Now comes the trickiest part of the job and that is to run the two wires from the new fan, through the hole and to pass them through a very small hole in the circuit board directly above the access hole and directly adjacent to the chassis of the amp.
We found it easier to pass both wires through some old wire sleeving and then to pass the sleeving through the hole in the circuit board to its designated position. Of course a small straw or something similar could be used should you feel it necessary. Once both wires are through the hole in the circuit board, you will see adjacent to the hole that there is a small 24v connection point which is ready to accept the wires from the fan.
At this point we can now secure both the fan and grill back in place and remembering to use the four long screws that we mentioned earlier in the project.
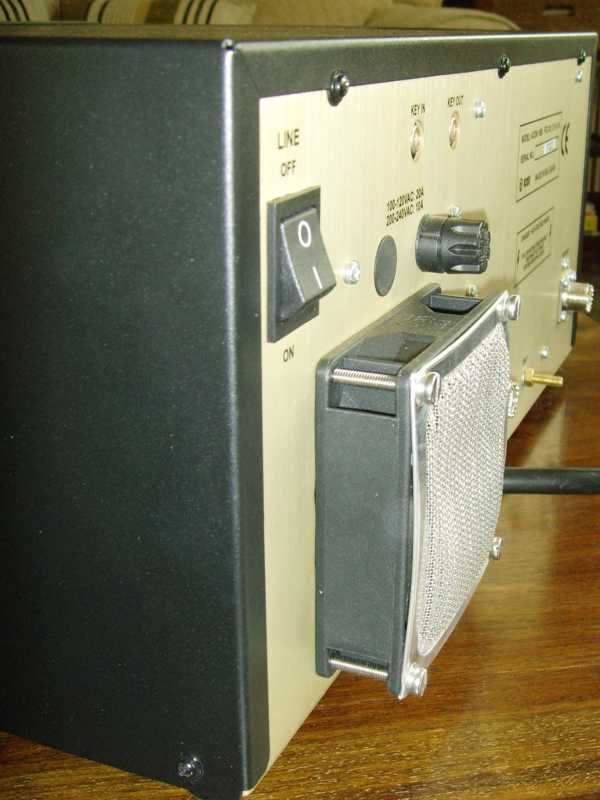
Two cautionary notes here! The first is regarding the grill which you can deal with now or leave until later. We have to be careful to ensure that the fan blades in the new fan do not catch at all on the rear ventilation grill when it is replaced. You will see in the Photo here that the after completion the grill is bevelled inwards which without doubt would catch the blades (Photo above). I found it easier just to add a little pressure to the grill in order that it would bevel out and avoid any chance of it catching at all when re-built.
If it does catch after it is putback together, a small self-tapper slightly screwed in to the grill will allow you to pull it away without a problem of damage.
The other note is to remember, have you fitted the fan in the correct orientation? The fan will have an arrow marked somewhere on its edge which shows in which direction the air will flow when connected. You must ensure you have it correct or the Amp will overheat instead of cooling down!
The correct way....
fan entry which can mislead you into thinking it is extracting air, but it is not.
I will post the results of the modification on here in a few weeks but certainly at this stage i can say the cooling time and resulting temperature is far less than without the mod.

help and use of his superior equipment to complete the task!!)
73 de Charles…..